Run a batch script in Azure pipeline

Azure Pipelines is a powerful continuous integration and continuous delivery (CI/CD) platform offered by Microsoft for building, testing, and deploying applications. One of the many features of Azure Pipelines is the ability to run batch scripts as part of your pipeline. Batch scripts are useful for automating tasks such as setting environment variables, copying files, and running tests. In this blog, we will discuss how to run a batch script in Azure Pipelines.
Recently, I encountered a situation that required me to execute a batch script file in a specific directory. The purpose was to gather all filenames in the folder and pass them as arguments to a command. Although this may seem like a straightforward task when working locally by changing the working directory in the command prompt and running the script from another folder, it can be more complex when working with cloud-based platforms such as Azure Pipelines. Therefore, I had to explore the proper steps to execute the batch script within the Azure Pipeline and obtain the desired outcome.
The source files to be processed are located in the "\Migrations" folder, while the batch files are stored in the "\scripts" folder.

Initially, I navigated to the "\migrations" directory and executed the command, which worked flawlessly. However, I encountered challenges when attempting to implement the same logic in a batch script in Azure Pipelines.
My objective was to configure the pipeline to execute the batch file after making the necessary changes to the repository. The pipeline also needed to pass the required variables to the batch file.
The BuildAll.bat file expected two variables to run the commands successfully. The first variable is the access token, which is a secret key that we can configure while setting up the variable in Azure Pipelines and the next is space id which is a normal text

Defined the variables and the access token is a secret token that needs to be kept secure.
The next challenge was to access the variables in the YAML file, which is used to define the Azure Pipelines configuration.
To access the variables in the YAML file, we needed to define them in the "variables" section of the YAML file. We also needed to specify the type of variable and its value. In the case of a secret variable, we needed to use the keyword "secret" to ensure that the value is encrypted.
Once we had defined the variables in the YAML file, we could access them in our batch script by using the syntax "$(variable_name)". This would allow us to pass the required variables to the batch file and ensure that it executes successfully within the Azure Pipelines environment.
- task: BatchScript@1
  inputs:
    filename: 'scripts/BuildAll.bat'
    workingFolder: '$(System.DefaultWorkingDirectory)/Migration/'
    arguments: $(access_token) $(space_id)
We can access the variables to the batch file through the argument parameter in the task like $(access_token) and $(space_id).
It's important to note that when passing secret variables, we need to use the keyword "secret" in the variable definition in the YAML file. This ensures that the value is encrypted and kept secure.
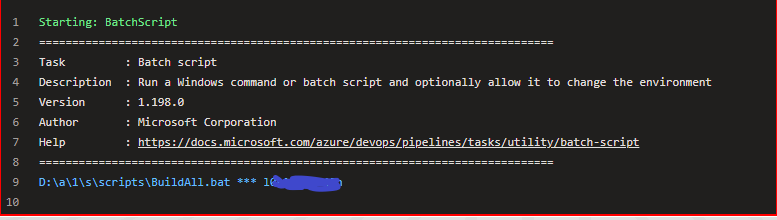
In the batch file, we can access the passed arguments using the syntax "%1" for the first argument, "%2" for the second argument. For example, if we passed the access token as the first argument, we can access it in the batch file using "%1". To keep the secret variable secure, we can mask its value by adding "***" instead of displaying the actual value.
By using this approach, we can ensure that our variables are kept secure and that our batch file runs successfully within the Azure Pipelines environment.
In conclusion, Azure Pipelines makes it easy to run batch scripts as part of your CI/CD pipeline. By following the steps outlined in this blog, you can quickly automate tasks and streamline your development process


